To reach enjoy a persistent aroma from your flame fragrance diffuser and relish it for an extended time, upkeep and upkeep cleaning are necessary. Lapses will result in clogging that makes it less efficient and lead to its delicate parts degrading. This blog talks about cleaning methods, best cleaning gadgets, and errors to avoid.
In order to get your flame aroma diffuser function properly for decades and perform well, there must be suitable cleaning materials and equipment at your disposal.

In preparation to clean your flame aroma diffuser, prepare the essential materials such as soft cloths, cotton buds, and a small brush. They enable you to access tight spaces for proper cleaning without harming any component.
Selecting the appropriate cleaning solution is instrumental in keeping your diffuser running smoothly. You have two general choices to select from.
Vinegar or lemon juice, being natural substances, can also clean your diffuser thoroughly of residue. They leave nothing toxic behind, giving a mild but effective clean to its parts.
For simplicity and convenience lovers, there are commercially sold cleaning products for diffusers. These maintain your device in a reasonable state and protect against the corrosive properties of essential oils.
Prepare your flame aroma diffuser for cleaning to prevent any accidents.
Switch off your flame aroma diffuser first for safety reasons. Next, unplug it from the power outlet.
Next, drain excess water from the tank. This avoids spills when disassembling and leaves no liquid residue that may affect its performance in the future.
Carefully take out any detachable parts, like the water tank or nozzle, depending on your model. This is where you get to clean every part separately for a smoother process.

Your diffuser is now clean, and it’s time to give it a proper clean. Handle every part even more carefully.
To properly clean the water tank, fill a commercial solution or a natural agent with water. Shake it in to remove any residue or buildup. For stubborn stains, scrub lightly using a soft brush or cloth. This prevents scratching the tank surface.
The mist outlet and nozzle require special attention since they are tasked with dispersing fragrances in the right manner. Dip a cotton swab in your desired cleaning solution. Apply it to reach these components and clear any clog or residual material that might hinder their function.
Finally, wipe the outside of your flame aroma diffuser with a damp cloth. This keeps it looking nice and removes dust or oil that may have built up over time.
After cleaning all parts of your flame aroma diffuser thoroughly, reassemble it and test it. This ensures everything works correctly.
Begin by putting back all the detached pieces with care and accuracy. Make sure components like the water tank and nozzle are securely in place. Check their alignment to avoid any operational issues.
Once reassembled, plug the diffuser and turn it on. Monitor its operation carefully to ensure the mist flows smoothly and evenly. Verify other features like color-changing lights or auto shut-off function properly. Testing guarantees that your diffuser can be used after cleaning and its functionality has not been altered.
In order to keep your flame fragrance diffuser in good condition and operating best in future years, clean it softly. However, do not make the same errors that might end up ruining it or hindering its operation.
One of the very useful tips is not to use harsh chemicals when cleaning your diffuser. These will ruin its sensitive parts over time. Use milder substances such as lemon juice or vinegar. Both of these work and are gentle.
Never soak the entire unit in water or liquid. This will cause electric damage and ruin your diffuser. Clean individual components separately and dry the internal electronics.
Cleaning is required periodically to keep your diffuser in its optimal state. Failure to clean regularly will cause buildup, and this will impact its performance based on time.
How often you should clean your flame aroma diffuser would depend on your usage and surroundings.
Think about how often you use your diffuser, and the oils used. More regular use or thicker oils can benefit from more frequent cleaning to avoid build-ups.
For everyday use, cleaning your diffuser every 1 to 1.5 weeks is recommended. If you only use it occasionally, monthly cleaning should be enough.
By listening to these recommendations and avoiding the pitfalls that trap so many others, you can ensure your flame fragrance diffuser continues to send a continuous stream of nice smells into your space.
It is important to keep your flame aroma diffuser in top condition for maximum performance and longevity. There are some sites that provide advice and suggestions on maintaining it in top condition.
Your user guide for your flame aroma diffuser is one of the most dependable sources. It has detailed instructions on usage, cleaning, and maintenance based on its parts. Following these maintains it in good condition for a longer time.
The internet has tips of all kinds on how to keep your flame aroma diffuser operational. User and expert advice is available on websites and forums. These can be employed to maintain your machine in optimal working condition.
Participating in diffuser communities can be highly rewarding. Online or offline communities provide members with the opportunity to share and discuss tips for diffuser maintenance. Shared experience has the effect of bringing out useful information that is not easily accessible.
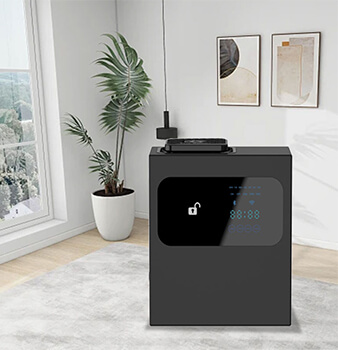
Ideal Tech Co., Ltd. is a great option. They are celebrated for their emphasis on quality and environment-friendly products suited to various needs. They offer products with fashionable designs and smart functions, including curved corners and touch buttons. These demonstrate advanced workmanship and cutting-edge features, offering an uninterrupted scent experience in various settings.
A: It could be due to oil or mineral buildup on the ultrasonic plate. Cleaning with a wash should restore the level of misting.
A: Yes, wipe the outside with a dry or damp cloth, but do not let water inside the light chamber.
A: 5 minutes quick cleaning, and 15-20 minutes deep cleaning, using the vinegar solution.
 133 Yan Ling Road, Tian He District, Guangzhou, China.
 Call us now:+86 18126872529
 Email:info@idealgz.com